


#2: JEANS TOWN*
*a place I vowed I'd never travel to in my sewing journey ("that looks HARD"), but now I've been and I'd like to go back ;)

**be warned, this is a long one! I hope the photos and diagrams help anyone looking to make jeans or think through the fitting process!!**
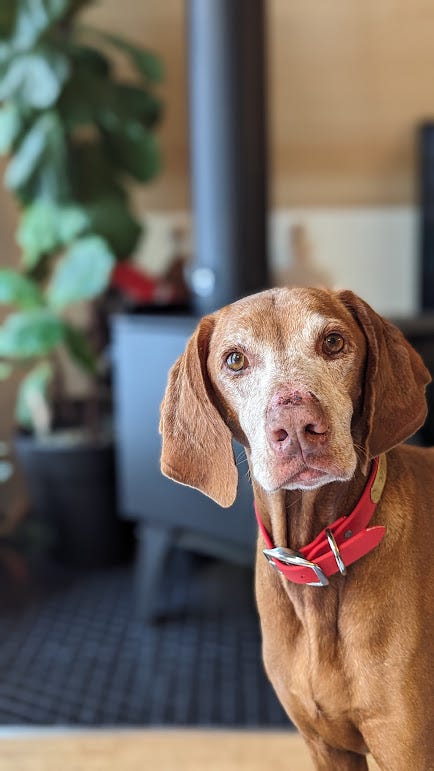
On the 29th, I turned a year older. Birthdays are a bit anxiety-inducing: starting 9 years ago when my first oncologist appointment landed on January 29th. I’m fine now, I am stronger, I am older, I have seen some SHIT and now every year around the sun is a reminder of all those things. Life is amazing and incredibly hard, and it holds both of those truths at the same time. For example: yesterday I turned another year older!! What a gift it is to age! But our celebration was quickly turned into me sobbing for 8 hours straight because we took our June pup to the vet (she hadn’t been herself for a weekish), and found out she has jaundice caused by something unknown. June came into our family right after I completed cancer treatment. I still had a buzz cut (thanks chemo) and June became my reason to be really excited about life/live in the moment/be active again. She’s my soul dog. She’s more well-traveled than most humans I know; June has camped in all sorts of deserts and forests, she’s enjoyed many wild hot springs, been to many big cities, and has summited plenty of mountains. As we speak, she’s still recovering at the vet and I’m generally beside myself thinking she might not be ok. She’s being monitored and seems to be on the mend, but being away from her while she’s not well is sending me into a tailspin. (UPDATED: she is doing much better, but still at the vet with an IV and getting bloodwork!)
WOW all of that to say: my birthday was big ups and big downs. June isn’t well, but I made another lap around the solar system, AND I have some really f*cking good-looking jeans that I wore all day.
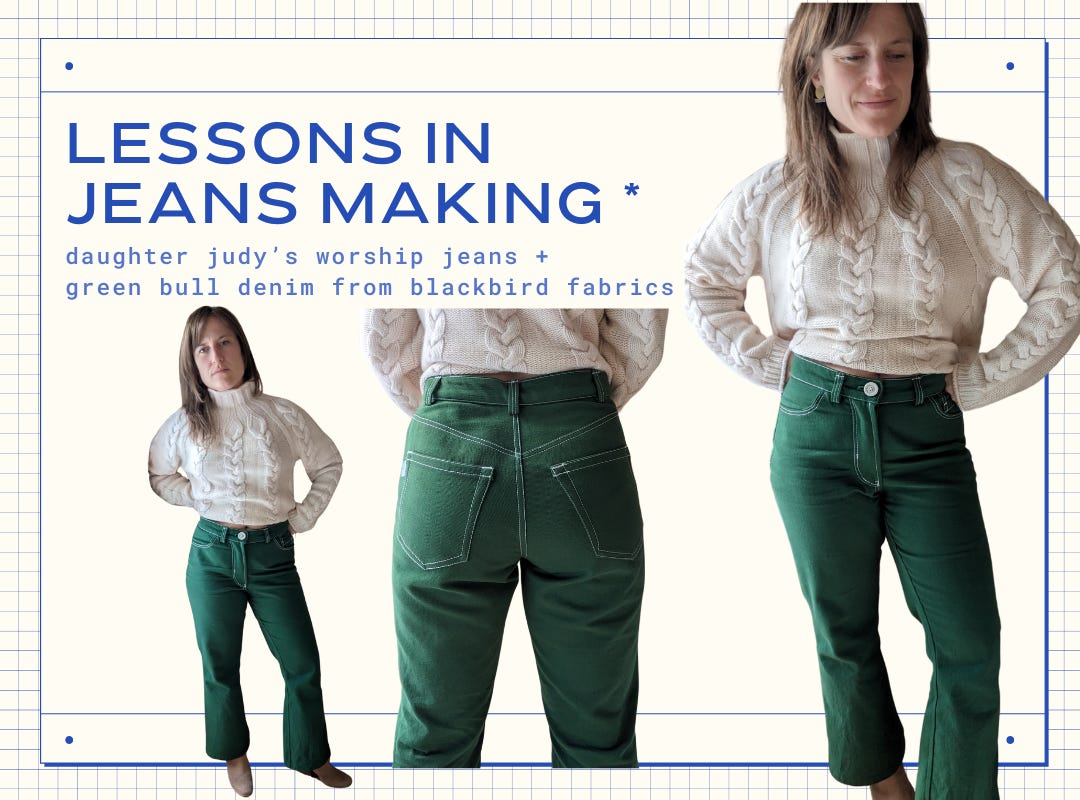
SO LET’S TALK ABOUT MY BIRTHDAY JEANS, and I’ll pick myself up from my pity party. Because if anything can cheer me up, it’s GREEN JEANS.
SELECTING A PATTERN
There are a LOT of jeans patterns out there in the world. I own a couple patterns but haven’t actually made a TRUE jeans pattern yet. I’ve made the Persephone pants (a few times), the Adams pants… I’ve also made the Harlene Overalls a few times. So I have practice with “hard” pants, but never a jeans pattern with the back yoke and all. I’m pretty sure the fitting of the jeans is what has scared me off.
The indie sewing world has churned out SO MANY good-looking jeans patterns, that it took me a while to land on which pattern to make. I’m glad I sat on the sidelines and waited as long as I did, to be honest. Instagram is a great place to watch, observe, and take notes on what patterns are working for which body types. There are patterns out there for stretch denim, rigid denim, selvedge denim… there are also so many different silhouettes: straight, curvy, skinny, high rise, mid rise, low rise, wide leg, etc. etc. etc. I do not claim to be an expert at any of this, merely a long-time observer.
The jeans in my wardrobe I continually reach for usually are mid/high rise, have some stretch, and are drafted for curvier bodies (aka I generally love my madewell curvy jeans).
For the longest time, I would start with Instagram to narrow down my pattern search, but I’ve been using the Backstitch.app (in beta testing!) lately for that, and BOY is it wonderful. Guro developed this app and it’s insanely great for organizing your stash, projects, patterns etc. There are also recent updates for rating patterns which is a huge benefit for our sewing community. I hope to transition from using Instagram as a pattern resource, and instead use Backstitch for organization and finding resources about patterns. At the moment, a quick search in Backstitch yields 64 indie jeans patterns. The sort option and filters are fantastic in this platform: it’s easy to filter and sort your way to what you’re looking for.

Ok, that was a long digress, but after carefully looking at pattern line drawings, pattern views, and finished projects on Instagram (all while carefully comparing to my current body measurements), I landed on the Worship Jeans by Daughter Judy Patterns. I’ve read over and over that Chelsea’s drafting works well on curvier-shaped people - and I’m so glad I listened. My body measurements for pants usually put me between MANY SIZES on the size charts, which is insanely frustrating. In the past, while making the Persephone pants specifically, I would grade between three or four sizes through the hips to the waist. Inevitably, the fit would NOT be right. The final product just wouldn’t look like the intended fit of the pattern.
I was also heavily influenced to make these jeans after reading Stacey’s blog post about the Worships. Her breakdown of how the drafting affects fit and wearability ultimately sold me. And, although I USUALLY prefer stretch denim, the Worship jeans are drafted for rigid denim with a straight waistband that has a slight “V” at the center front, making them very wearable since they don’t cut into your waist while seated.
So, let’s goooooo, Worship Jeans!

THE HORRORS OF PANTS FITTING*
*but maybe the worship jeans have made me not-so-wary?
After referencing Daughter Judy’s size chart and finished garment measurements, I landed on printing a size 8. Although my waist is a bit smaller than the size 8, I wanted to use the fitting methods of
and her Top Down Center Out method. Choosing an 8 would give me .5” of positive ease at my hips, and I could use TDCO to adjust the waist to get the fit I prefer.I've mentioned before that
has an amazing series of YouTube videos on the topic, including fitting jeans with a yoke! I also referenced Stacey’s blog post a bit further up in this post, but seriously, if you’re considering making these jeans, it’s worth a read.
Toile #1: Size 8: the only adjustment was to reduce the length of the inseam from 29” to 26”. I am 5’-1” and the pattern is drafted for someone who’s 5’-6”. I typically reduce inseams to 26” if I don’t want a cropped length.
It felt strange to make almost zero adjustments for the first draft, but I’m glad I didn’t. It helped me pinpoint changes to make for my body.

As you can see, the back of the pants looked GREAT according to *my standards. The front was… leaving something to be desired. You can also see that there was some slight gaping at the center back. (Usually, a curved waistband solves this issue for me.)
*my standards = I do not look for a PERFECT fit, I look for a good-enough-for-me-fit :)
Plan of action:
Based on a lot of measuring and observing, I know that my pelvis tilts to the front/forward. This means I often need to lower the rise ONLY at the front of pants. I’ve found this is the case with most ready-to-wear pants - they are never quite right. The bagging at the front/crotch is a symptom of this issue.
I (of course) posted some stories on Instagram asking for input on what adjustments to make. My friend Francesca gave me some advice to take a wedge out of the front pattern piece and lower the front rise (and eliminate some of that extra fabric):

The issue is that I had already cut out all the good fabric - and would have to re-cut the front leg pieces if I wanted to make this adjustment. But this led me to a lightbulb moment… I could probably get the same result by just moving that wedge to the top of the pattern piece:

This way, I wouldn’t have to re-cut this pattern piece, I could just adjust the one already cut out (and I didn’t have enough fabric for the former anyway!). Taking a wedge out of the top of the pattern piece is more in line with the TDCO method - which ONLY makes adjustments at the out seam and waistband, leaving the crotch curve and inseam unchanged. TDCO edits just feel easier to me, and more intuitive, and I think I’ll keep attempting to use this line of thinking when making fit changes to my pants going forward.
Toile #2: Size 8, but with tweaks: decrease front rise by 3/4” (in diagram above), increase seam allowance at the outseam to 3/4” instead of 1/2” (to account for denim stretching with wear), swap straight waistband to a curved waistband (from Ginger Jeans pattern by Closet Core Patterns), slightly decrease length of waistband, and kept inseam at the already edited 26”.

The front view of the pants changed DRAMATICALLY with those little changes and I’m so glad I took the time to think through each one!
CONSTRUCTION OF FINAL JEANS + FABRIC SELECTION
I have quite a few bottom-weight fabrics I was considering but landed on this 9.5 oz green bull denim from Blackbird Fabrics (it looks like they’re out of the colorway Emerald that I ordered, but the Caper is gorgeous too!). I ordered this fabric during the black Friday sale, and I swear to god it traveled all over Canada for a month before it got delivered to my house in Idaho LOL… WORTH IT.
I chose a white topstitching and a white button to contrast with the green bull denim and I truly LOVE the outcome. I opted to not do a contrasting topstitching in the inseam like the instructions direct you to do, but that was just a visual preference for me. I really liked the topstitching guide that DJ used on the back pockets, I think they look great.
I wanted also to note some things about the instructions/drafting to be aware of:
Waistband:
Length: When I made my first toile, the waistband ended up being 1.5” too short. I measured the pattern piece, and the measurement chart and something was just off?? I printed my pattern at home on A4, and I think this might have something to do with it. Alyx (enderallsews) posted that she had the same issue, and many others chimed in on her post, so this is just something to be aware of! (and everyone who chimed in also printed A4. The A0 doesn’t seem to have an issue). I think from now on I will always add a few inches to my waistband pattern pieces: it saves so much headache in the long run and is so easy to do.
Construction: I’ve sewn enough patterns in my small amount of time sewing to know that sometimes I prefer certain pattern instructions over others… This includes the waistband here (DJ instructions weren’t bad, I just like to be told EXACTLY what to do lol). I’ve used the Ginger Jeans waistbands for most pants I’ve sewn, mostly because I think it produces the most accurate and clean final product. I like the sequencing and really like the outcome of these instructions!
This particular step makes the edge SUPER CLEAN and aligns the zip fly with the waistband in a way I’ve never been able to achieve with other sequencing:

Zipper construction: This video that Stacey mentions in her blog post was what I needed! For some reason, the illustrations in the DJ instructions really threw me for a loop, and I seam ripped 3x before I found that video.
Front crotch: This was another step where I took Stacey’s advice and used some seam tape and basting to get the front crotch to align and stay put while I topstitched it:

Back pockets/coin pocket: In order to have “twin” back pockets instead of “sisters”, I like to baste both pockets together with the front of fabrics facing each other. I then iron the seam allowances and pick apart the basting stitches. Voila, twin pockets! I learned this trick on Instagram somewhere and I haven’t a clue who posted this method… but thank you whoever you were! I also have been in the habit of finishing all the edges of pockets on my serger before ironing and topstitching to my back leg pattern pieces. I hate the feeling of loose threads in my butt pocket, lol.


HERE SHE IS!

As someone who vowed to never make jeans because they looked *WAY TOO HARD*, I am really glad I took the plunge. With a high waist-to-hip measurement ratio, it’s just really difficult to find patterns that work for me, but if we’re being honest: I’ve never loved any jeans I’ve purchased from retailers either. I wear jeans most days of my life, so why not be BEAMING with excitement for how they fit? Can I also opt out of the churn of fast fashion by making my own jeans, instead of continually buying new ones in the hopes that they *might* fit me better? The answer is YESSSS.
I don’t think jumping into jeans-making would be enjoyable for someone just starting out with their garment-making journey, but a few years in, I am happy to say this was quite enjoyable. I took my time with the fit and the construction details, and now I really do not want to take these jeans off. We’re on day three of wear as we speak, folks.
Green is my color, as most of my sewing Instagram friends know :), and I just feel hecking good in these jeans.
Have you made jeans?! Are you bursting with excitement like I am at the prospect of being able to sit, squat, look CUTE all at once!? I hope so.
That’s enough rambling for one post. Over and out-
XO Katie
This was so interesting to read. I don’t think I’m far enough in my sewing journey to try jeans, but I’ve been eyeing a couple patterns. Thanks for all the tips!
Omg they are amazing!!!! The green bull denim is perfection. I just made my third pair of worship jeans and it is absolutely my favorite jeans pattern of all time. Also I’m so glad that my blog post was helpful! ☺️
We seem to be on the same wavelength recently as not only did we both just have birthdays but my kitty has been very very sick and I have been beside myself for a week crying a puddle of tears. So I completely empathize with how you feel about your sweet pup. I’m glad she’s doing better! My kitty is starting to get better too. Fingers crossed they both bounce back quickly. ❤️🥲